Wednesday, December 22, 2010

Thin Bowl


This bowl is about 1/8 inch thick. It was a fun project to make. I originally intended that it should have a round base to be a rocking bowl but when it was completed it looked like it needed a little lift, so I added a ring of rosewood as a base.
Due to its thinness the light shines through the wood making it quite spectacular as it sits in the sun.
The bowl is bout 7 inches in diameter.

Sunday, December 5, 2010

Small turned box with top top


Here is a fun project to make and behold. The picture shows three of these boxes made from sugar maple.
The top of each box is a spinning top. Hence the title: Box with a top top.
In the picture the box on the right is actually upside down with the top spinning on the bottom of the box. Hope that is clear??
In a (much) earlier post I described how I made the tops. Each top takes about five minutes to make to completion.
The box takes longer as it must be measured as it is turned. Every time that the lathe is stopped it takes time.

Monday, November 29, 2010

Metal Spinning Demonstration at the Kingston Woodturners


Photo above shows Dave mounting a copper disk on the lathe. The copper is from some sheet copper that was part of my house roof. Dave has annealed the copper by heating it cherry red with a propane torch before mounting it. It is clamped between the wood form on the headstock and a small wood plug against the live center in the tailstock.


Here you can see Dave leaning in to apply pressure on the copper. As the tool moves to the outside the speed of the lathe must be increased. The tip of the tool is held below center.


Here one can see the copper disk taking shape.


The disk was a little larger than the form so the upper edge was not held against the form hence the ripples in the form. This needs soaking in a water, vinegar and salt mixture to remove the oxide coating.

Sunday, November 28, 2010

Christmas Craft Sale at RMC

Had some of my woodturnings at the annual Christmas Craft Sale at the RMC gymnasium this past weekend.
Sold many small items but NO big bowls. Customers seemed scared off by anything over $20. Good thing I made a pile of tops and little boxes before the sale. Will have to remember that for next year. However one can never tell as I sold a few larger items last year at the same sale.


At least the club was not out of pocket and made enough to cover the costs for the booth.

Bur cucumber mature

Earlier I had posted some pictures of the prolific bur cucumber as it spread its vines on the farm. Here are some mature seed pods to help identify this pernicious pest.


Saturday, October 2, 2010

Kingston Fall Fair demonstrations


Here I am demonstrating wood turning at the Kingston Fall Fair.


There were a few audience members here in the evening. I figured I made and sold more than 50 spinning tops. $2.00 each so not much profit but fun watching the little ones.

Thursday, August 19, 2010

Burcucumber (Sicyos angulatus)


Here is a close up of this pervasive weed vine that starts its growth in late spring. It really goes to town in good growing season weather. I have not noticed it so prolific before. Another sign of global warming as it seems to be in south western Ontario but has not made real inroads to eastern Ontario.
Its quite noticeable along the 401 highway near Toronto.
More here.

Wednesday, August 18, 2010

Thistleha

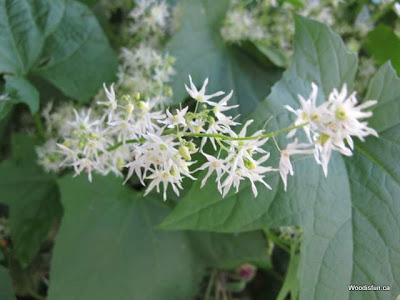
Does not look much like Canada but this is near the village of Brougham to the north of Pickering in Ontario. This is the sun setting through the woods and undergrowth. It has been an outstanding year for plant growth and this weed vine (burcucumber) has taken over the woods. Too bad there are no wood burls (burrs) involved.

Another view but before the sunset.

Wednesday, July 7, 2010

Eli demo continued


This bird ornament was made for demonstrating the use of the skew


Note the convex bevel on this skew chisel. Honed.


This is the "texture tool" made from a concrete drill.

Some of the tool hints that Eli Avisera left me with:
  • Use rounded bevels on skew and beading tool. (As opposed to the more traditional hollow ground bevels.) Eli honed his skew on a buffing wheel with green buff compound. See the video on the previous post.
  • Have very small bevels on gouges. The rest is just "cut away".
  • Use epoxy filler to fill the flute of small gouge to reduce flex.
  • Use a carbide tipped drill to make a texture tool filling the flutes with epoxy.
  • Round stock made into a "combination tool". This is a bit like a gouge with no flute and "negative rake'. Check his webpage for more details.

Eli Avisera demonstration at Kingston Woodturners

Had a great demonstration about woodturning from Eli Avisera from Israel. He is an excellent demonstrator. He started by discussing tool sharpening. I include a video that is a little reminder about his sharpening tips.
To see more about him check his website. He also has some excellent videos for sale so this video is just a sample of his presentation style etc.
Check his tools here.


In later blogs I will have some of the video footage of Eli making some small projects.

Tuesday, July 6, 2010

Magnolia Scale


This is what Magnolia scale looks like. The insect inside is soft bodied and stains cloth red when wiped off at this stage. For more information check out other websites.
The treatment we gave the tree is experimental at this stage but I sure hope it works as it cost a lot of money!

Magnolia Scale Treatment Experiment


John from Arbrecare Kingston came by to treat our Magnolia tree for scale.

He used these vials that are spring loaded and injected this insecticide - organic - into the tree. It is very expensive and made for Emerald Ash borer but hopefully it will work on this "scale" which is like an aphid which protects itself by forming a grey scale over itself. It leaks honeydew all over the place including the leaves which then attract bees and wasps and flies, and makes a real mess of anything under the tree. It also feeds a black mould which discolours what it forms on.

This is the insecticide.


The picture above shows the plastic inserts which are wedged into holes drilled in the tree.

Sunday, July 4, 2010

Demo day at the Museum


Here I am at the MacLachlan Woodworking Museum doing the first of the five summer demonstrations on woodturning.

I made two small bowls and two spindles which I will use in the new studio.


Also made a top to give away to one small boy who had an attention span long enough to watch the operation. Spectators were sparse.
There will be another demonstration next Sunday the 11th of July from 1 to 3 pm.

Saturday, July 3, 2010

Compost Bin Visitor


Here is another look at the visitor to our composter. It appears to be an opossum.
Now it should be noted that opossums are not normally found in this climate - another sign of global warming? This little guy does not look very happy but at least it should be well fed as the food scraps are all gone. And of course it does not have to worry about the winter for a while yet.
Yesterday was a great windsurfing day so not much got done. Then today I awoke with a sore wrist from a previous injury - fell off my home built skateboard - so my wrist has never fully recovered. But drywall mudding is hard on the wrist so I am somewhat frustrated that I cannot do the type of job I would like to do because the wrist just does not want to work well. Of course the windsurf did not do much to help heal the wrist either. I am treating the wrist injury with Emu oil. Check it out, I am amazed at how well it works. Seems to go right through the skin and lubricates the joint.

Thursday, July 1, 2010

Ceiling panelled


Rented a hoist and completed the drywalling of the ceiling yesterday. Also mudded the office space today.
Drywall hoist worked real well.
Noticed that they are selling hoists for $160 at a local building supply store. Cost $40 to rent it for a day. The hoist sure is an improvement on the old T bar system that I used to use when I installed drywall before.

Tuesday, June 29, 2010

Windsurf day finally!


Finaly got some windsurfing in yesterday after table tennis and dance class. Got to sail all the way to Snake island which is about a three mile sail. Good wind though and the Go board was working well with a 7.9 M sail.
Then went out and bought the drywall for the ceiling and office of the studio. 26 Sheets of drywall, mostly 4 X 10 s but some 4 X 9 s for the walls in the office.
A lot of loading as they had only one helper at Home Depot to load all the drywall and then I had to unload it into the studio with Rob's help.

Monday, June 28, 2010

Insulated Foundation Treatment


Just a little picture to show what the foundation covering looks like after it has been painted.

Rosette in Place


Here is the rosette as it was designed to be installed. This is 1/4 inch proud of the trim with the same width as the trim.
Some will be painted (In the workshop section) and some varnished in the office section.
Next big job is installing the ceiling. It has been hard to find a rainless window to pickup the drywall.

Sunday, June 27, 2010

Making Rosettes

This video shows how I made the 14 rosettes that I needed to complete the trim for the new studio. The tool I used is home-made from a tablesaw shaper cutter (Craftsman) which is mounted on a steel shaft set into a woodturning handle. There are a vast array of these shaper cutters available in a variety of shapes. This one was given to me by Ron (http://sawdustandglass.com/index.html) for completing bowl bottoms.


The process takes less than a minute per rosette. I mounted the rosette on the surface of the window trim in the video but for the other windows I am mounting them only 1/4 inch proud of the trim.
Advantages of using rosettes are the appearance and the ease of installation. (No miters to cut)

Saturday, June 26, 2010

Little surprise in the compost bin


This is what greeted Janet this morning when she went to empty the compost bin. Quite a surprise!

Thursday, June 24, 2010

Before and after shots.


Here is what the space looked like before the garage was built

And this is after. Grass has done well in all the wet weather.

Skylight Update


What the skylight looks like from the outside.


And from the inside now that the well has been completely covered with 1/4 inch plywood. All caulked with white painters caulk.

Garden is coming along too.

Here is what the vegetable patch looks like after the big excavation job.

Surface Mount Electrics


What the electrical boxes look like surface mounted in the studio. All at 51 inches high to make for easy access.

Installed a Skylight


This picture is of the skylight with one piece of plywood installed in the well.
Well I got a little help to install a skylight right over the "lathe nook". Does it ever make a difference! Very nice and bright down there now.
I purchased a discontinued model skylight from Home Depot for $50. Also got some sticky one side tar film by Velux. I laid down the film around the opening, applied a bead of roof mastic and set the skylight onto the mastic. Then screwed it down with 1 1/2 #8 deck screws. The skylight was the type that needed no additional flashing but I still applied a layer of the velux film over the edge of the skylight to ensure a waterproof installation.
Certainly no leaks so far and we have had quite a lot of rain since I put it in on Tuesday morning. The worst part of the job was removing the shingles but fortunately the roof is pretty new and the shingles had not set together all that hard.

Saturday, June 19, 2010

Electrics Getting there


Above is what the main electrical panel looked like before it was tidied up a bit.


All wiring will be external so the wires simply project out of the OSB wall panels like the ones above. This way all the wall piercings are easily sealed tight. Sealing inset electrical boxes is much more involved.


Here is an electrical box all taped over for painting.


And the main panel is looking a lot neater now.

Friday, June 18, 2010

The Lathe Nook


This is what the skylight well looks like which will be directly over the "lathe area" nook.


Here is the lathe nook. My plan is to curtain this off with plastic - floor to ceiling. Install the dustcollection system outside the "nook" so that I create negative pressure within the nook to keep the dust from polluting the rest of the work area.
The wires protruding from the walls are outlets to be installed - more about that in my next blog.

Wednesday, June 16, 2010

Foundation Covering Treatment

These pictures show how the exposed foundation wall, which is proud of the main stud wall covered with styrofoam insulation to make it even further outstanding has been covered. I used 4 inch wide by 1 5/8 inch thick spruce lumber with a recess cut on one side to top the covering and OSB to cover the sides. The OSB is glued against the styrofoam. Since the floor of the workshop is slightly sloped to the door the OSB had to be cut to fit. The spruce lumber was toenailed with screws to the walls.


Tuesday, June 15, 2010

OSB interior


Here is what it all looks like with the OSB sheathing in place on the interior. Sorry about the mess but it is a work in progress. Next step is to cap and cover the blue foam at the bottom of all exterior walls.
The framed walls are 8 feet tall but since I wanted and interior height of 9 feet I allowed the foundation walls to stand a foot proud of the floor. This technique allows for simpler construction as all panels are precut to 8 foot. However it does mean that i have to spend a little extra time covering the foundation walls. I had kept 2 inch foam panels against the foundation walls which are now solidly held by the floor. So I am using foam adhesive to keep the OSB covers in place over the foam.